Showing posts with label craft. Show all posts

Saturday, October 12, 2013

DIY Halloween and Day of the Dead Bunting Tutorial

When you decorate for Halloween don't limit yourself to just black and orange decorations!

Think "Day of the Dead."  This Mexican holiday seems to have been pulled into Halloween traditions, most likely because of the use of skeletons during Day of the Dead celebrations and the close proximity in Holiy dates.  Did you know that the Day of the Dead is celebrated on November 1st?


Day of the Dead is not so much a morbid holiday as it is a celebration of loved ones who have passed.  So it makes sense that tons of colorful flowers are used in celebration on this day.

This year, I chose neon colors to add to the classic black and orange used at Halloween. Here's how I made a bunting that combined traditional colors of Halloween and bright colors of Day of the Dead.

I started out by cutting strips of black and orange card stock.  I trimmed these and cut decorative edges on the end of each strip of paper.  The papers were cut symmetrically so that they could be folded in half over ribbon or cord and look the same on both sides of the bunting.


There was no order as far as the way I placed my paper flags on the cord.  I just grabbed from my pile of paper flags, placed the flag over the cord, and put a dot of hot glue between the two sides of the flag.


The Day of the Dead skulls were made from felt.  Each one was drawn free hand with neon fabric markers. The skulls were also made to be folded over the cord just like the flags.  After every five or so flags I placed a skull over the cord and secure it by hot gluing the two sides of the skull together.


I repeated this until I reached my desired length of bunting.


So when you decorate your home for Halloween this year take a lesson from this Mexican festivity and include all sorts of colors in your Halloween decor.


Monday, October 7, 2013

DIY Preschool Halloween Decorations

Let your preschooler run wild with this paper folding activity that you can use in your home as Halloween decor.

It's as easy as it looks.  Cut different lengths and widths of orange and black paper.  Show your child how to fold a fan, making their first fold across the paper starting about an inch away from the bottom. Flip the paper over and help your child make the next fold about an inch away from the last fold.  Show your child how to repeat the process, flipping the paper over and folding, until your child runs out of room to fold.

You can hang your child's folded masterpieces by threading white embroidery floss through a needle, tying a knot at the end of a piece of thread, and poking a hole with the needle at the top of the folded paper.  Bring your thread up through the hole in the paper until you reach the knot at the end of your thread.

I used adhesive putty to attach the thread on the ceiling.  You can use tape or whatever you have.  Let the paper hang at different lengths for a great Halloween decoration made by your kids.

Saturday, October 5, 2013

Leopard Print Wall Map

Need to spice up a dull wall in your home?  Leopard print will do the trick.


To make this leopard print wall map, I used an outline of a map I found online.  After printing, I cut out the basic shape of the map and traced it onto the back of this leopard felt.  You can find this kind of animal print felt in most craft stores. I found mine next to the sheets of craft felt.  This particular felt was thicker and more firm than craft felt so it held its shape nicely.

Once my map was cut out, I attached it to a piece of white cotton fabric that I had previously stretched across the back of a barn-wood frame and secured with staples. I just had to center my map and hot glue it onto the fabric.


For a personal touch, I added heart-topped pins to the map in places that are near and dear to our hearts. For the heart-topped pins I just hot glued tiny wool felt hearts to each pinhead.

If you feel a little nervous about putting something as wild as an animal print on a wall in your home, don't worry.  I heard that leopard is a new "classic" print.

Wednesday, September 25, 2013

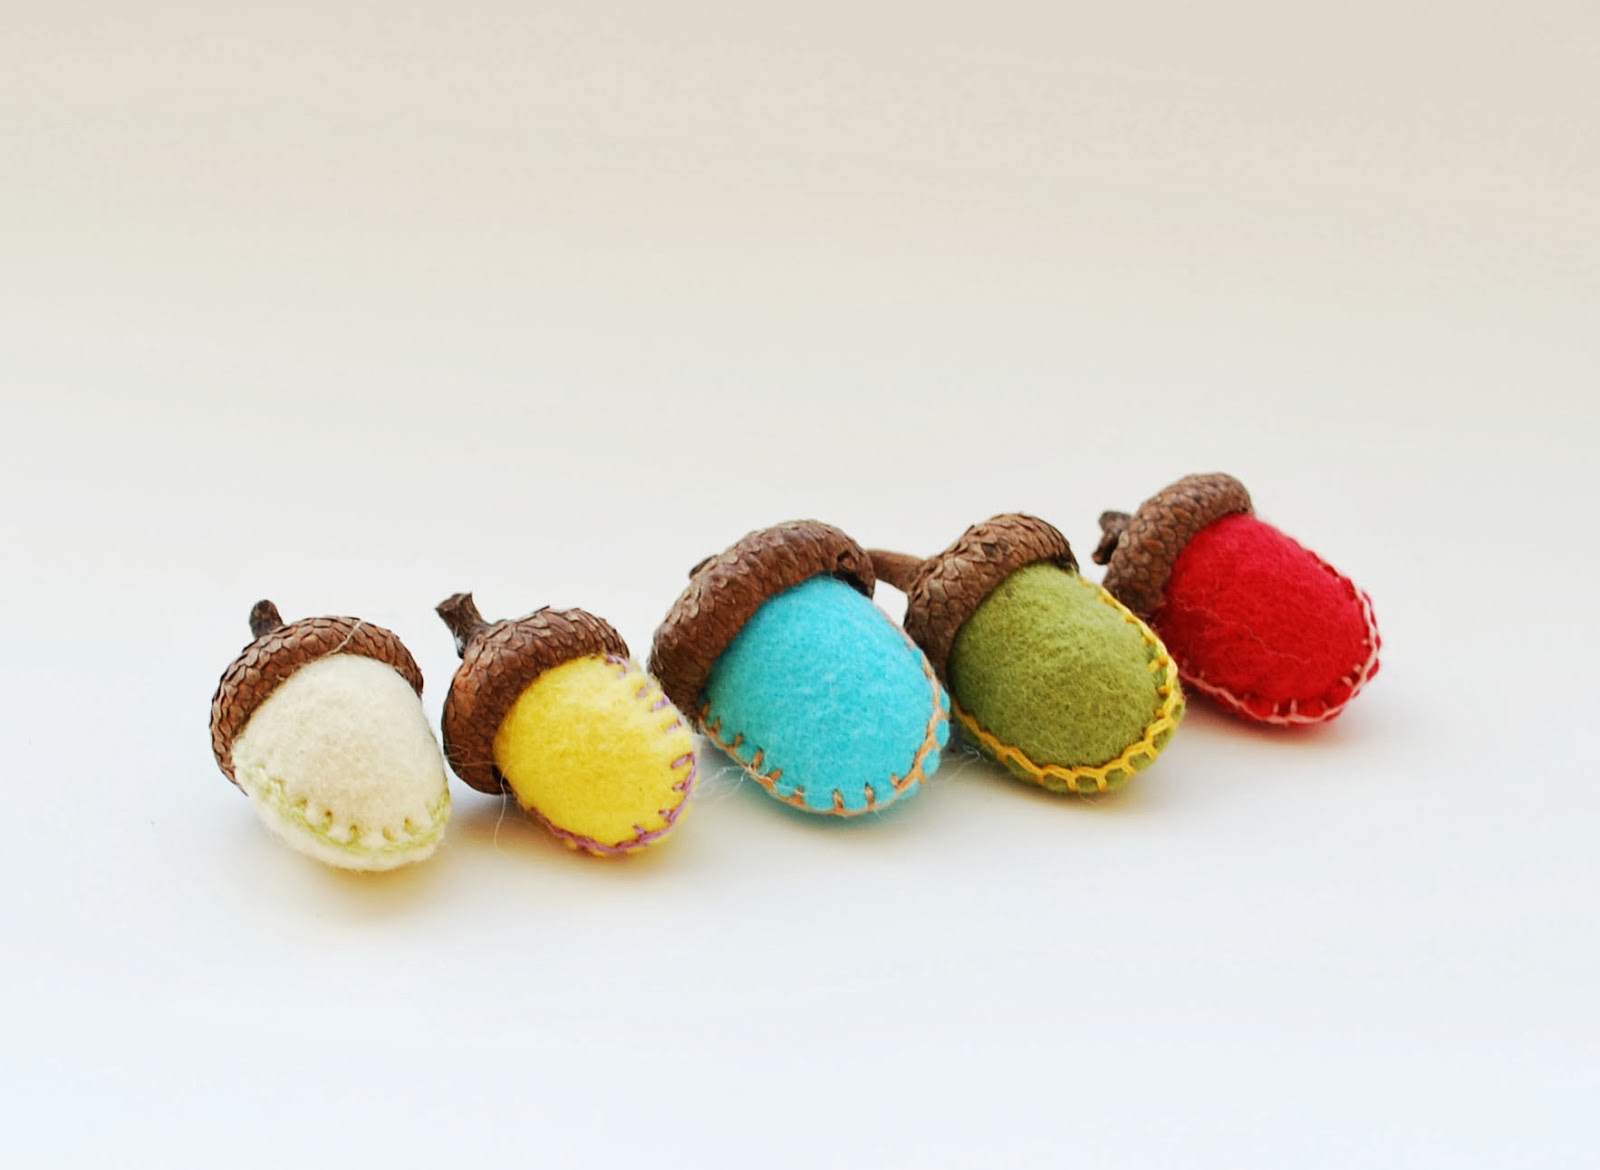
Wool Felt Acorn Tutorial

I started making felt acorns seven years ago.  I was living in an area with a plethora of oak trees and there seemed to always be hundreds of acorns on the ground.

I made these little felt acorns to pass the time. I was far away from family with no car and no television. I also made these felt acorns to share with family members.  My mom and her side of the family have a connection with acorns. Along with other reasons for the connection, their high school mascot was the 'mighty acorn'.  You can't beat that for a school mascot!


Felt Acorn Tutorial

Materials: 
Two small pieces of wool felt
Embroidery floss
Wool roving or other stuffing
Real acorn caps

Tools:
Scissors
Embroidery needle
Hot glue gun
Hot glue sticks


Step 1: Cut the felt

Cut two pieces of felt to 1 square inch each in size.  In this tutorial I use two different colors of blue wool felt so it's easier to see how I make the acorn.


Place the felt squares together. Using your scissors, round off two corners of both of the felt squares.  This makes your basic acorn shape.  The rounded corners are the bottom of the acorn nut.

Step 2: Blanket stitch

Thread your embroidery floss through your needle.  Choose how many strands of thread you will use based on how much you want your thread to show.  I chose to use a contrasting color of thread and use two of the six embroidery-floss strands.

Place your two pieces of wool felt together so they are totally lined up.  Starting at the top corner of the acorn, blanket stitch around the edge of the two pieces of cut wool felt, sewing them together. When you finish, you should have something that looks like a tiny pocket. Trim the extra thread.


Step 3: Stuff and Glue

Stuff your felt acorn with tiny pieces of wool roving until it is firm.  It will be helpful to have several different sizes of acorn caps at this point.  Try different caps on your felt acorn until you find the perfect fit.  Once you find the acorn cap you are going to use, flip it over and put hot glue around the inside edges and in the middle of the underside of the acorn cap.  Gently push the felt acorn into the underside of the cap, open side up, and hold until the hot glue has cooled.


And you're done!

It was this little acorn that I crafted seven years ago that got me thinking about sharing my crafts with others.