Showing posts with label kid's craft. Show all posts

Monday, October 28, 2013

Spider Web Embroidery Tutorial: A Perfect First Embroidery for Kids

This Halloween, teach your child how to embroider with this super simple spider web embroidery.  The huge stitches on this embroidery gives kids the feeling of immediate success.


When teaching your child how to embroider, it's important to be right there with your child.  This will minimize potential frustration on your child's part and keep him safe from the sharp point of the embroidery needle.

So if you have 30 minutes to an hour, you and your child will love doing this project together!

Let's get started.

Before getting your child for this project, get all of your supplies ready.  This was Micah's first embroidery project so I wanted to make sure I had his full attention.  He's only four years old, so if I had him gather materials with me and get the embroidery hoop ready, I think he would have been done with the project before we even started sewing.

You will need:
cotton fabric (preferably black or white)
cotton embroidery floss (use black floss if your fabric is white and vice versa)
embroidery needle
embroidery hoop
scissors
transfer pen or pencil

Get Your Embroidery Hoop Ready

Unscrew the embroidery-hoop fastener and take out the inner hoop. Place the inner hoop under the fabric and place the outer hoop over the fabric around the inner hoop. Gently pull on the fabric until it is taut. Secure the fabric into place by tightening the fastener.

Make a Spider Web Guideline

Now you are going to draw dots on the fabric with your transfer pen or pencil that will be a guide for you and your child when sewing the spider web.

Each spider web is unique, but a similar method for the dot guideline is used for all of the spider webs. Decide if you would like a full circle spider web, or a portion of a circle.  Place one dot where you want the middle of your spider web to be sewn.  This dot is the origin of your spider web.  The origin of my spider web is on the edge of the embroidery hoop. Place the other dots around the outer edge or what would be the circumference of your spider web 1 to 2 inches apart.


I decided not to make my spider web a perfect circle.  So when placing the dots around the circumference of the spider web, I purposely misaligned several of the dots.

Thread your Needle

Thread all six strands of embroidery floss into the needle and knot the end of your thread.  I recommend using a long piece of thread (2 feet at least) because your child's stitches will be so big.

Now go get the kiddies!

Time to Sew 

Have your child push the threaded needle up through the origin or center of the spider web and gently pull until the thread is stopped by the knot at the end.  Choose one dot on the circumference of the spider web and have your child push the needle down through the marked spot and gently pull until the thread stops. That is your child's first (huge) stitch. Let's call these stitches the "runner" stitches.


Your child will now bring the needle back up through the origin pulling gently until the thread stops.  Choose another circumference dot and send the needle down through the fabric at this spot.


Help your child repeat this process, sewing large runner stitches from the origin outward until all of the spider web guide dots have been used.

When your thread runs out and you cannot make another stitch, just tie off your thread close to the fabric on the underneath of your embroidery and trim the extra floss.  Re-thread your needle and start your embroidery where you and your child left off.

Next, make back stitches with your child, going from one runner stitch to the next, starting on one end of the spider web. Make several rows of these stitches across the runner stitches all at about the same distance apart.  Repeat this process until your spider web is complete.


And there you have it.  In just about 30 extra large stitches your child has completed his very first embroidery! Hooray for kids!

If your child is not quite ready to embroider, you can still get him involved.  Have your child pull the thread through the fabric after you have make the initial poke with your needle.  Keep practicing until he feels confident to sew right along with you.


Monday, October 7, 2013

DIY Preschool Halloween Decorations

Let your preschooler run wild with this paper folding activity that you can use in your home as Halloween decor.

It's as easy as it looks.  Cut different lengths and widths of orange and black paper.  Show your child how to fold a fan, making their first fold across the paper starting about an inch away from the bottom. Flip the paper over and help your child make the next fold about an inch away from the last fold.  Show your child how to repeat the process, flipping the paper over and folding, until your child runs out of room to fold.

You can hang your child's folded masterpieces by threading white embroidery floss through a needle, tying a knot at the end of a piece of thread, and poking a hole with the needle at the top of the folded paper.  Bring your thread up through the hole in the paper until you reach the knot at the end of your thread.

I used adhesive putty to attach the thread on the ceiling.  You can use tape or whatever you have.  Let the paper hang at different lengths for a great Halloween decoration made by your kids.

Friday, September 27, 2013

Personalized Ribbon Bookmarks

These little bookmark people are easy to make and can be a lovely gift.  Set the bookmark ribbon over the page you’d like to keep marked and the bead people on the end will hold your place.  These bookmarks can be fun because you can personalize the bead people to look like anyone you’d like. 


To make these bookmarks I painted hair, eyes, and pink cheeks onto wooden beads using acrylic paint and strung them on the ends of a piece of ribbon. I measured the ribbon by doubling the length of a standard size book and adding a few inches for the bead people.   Immediately after each wooden bead, I strung a glass bead for a tiny body.  I secured these beads in place by tying a knot at the end of both sides of the ribbon.  


You can keep the ribbon from fraying by melting the ends carefully using a match or candle or by painting clear nail polish on both ends of the ribbon.


Can you guess who I patterned my little bookmark people after?  My kids, Micah and Ev, of course!

Wednesday, September 25, 2013

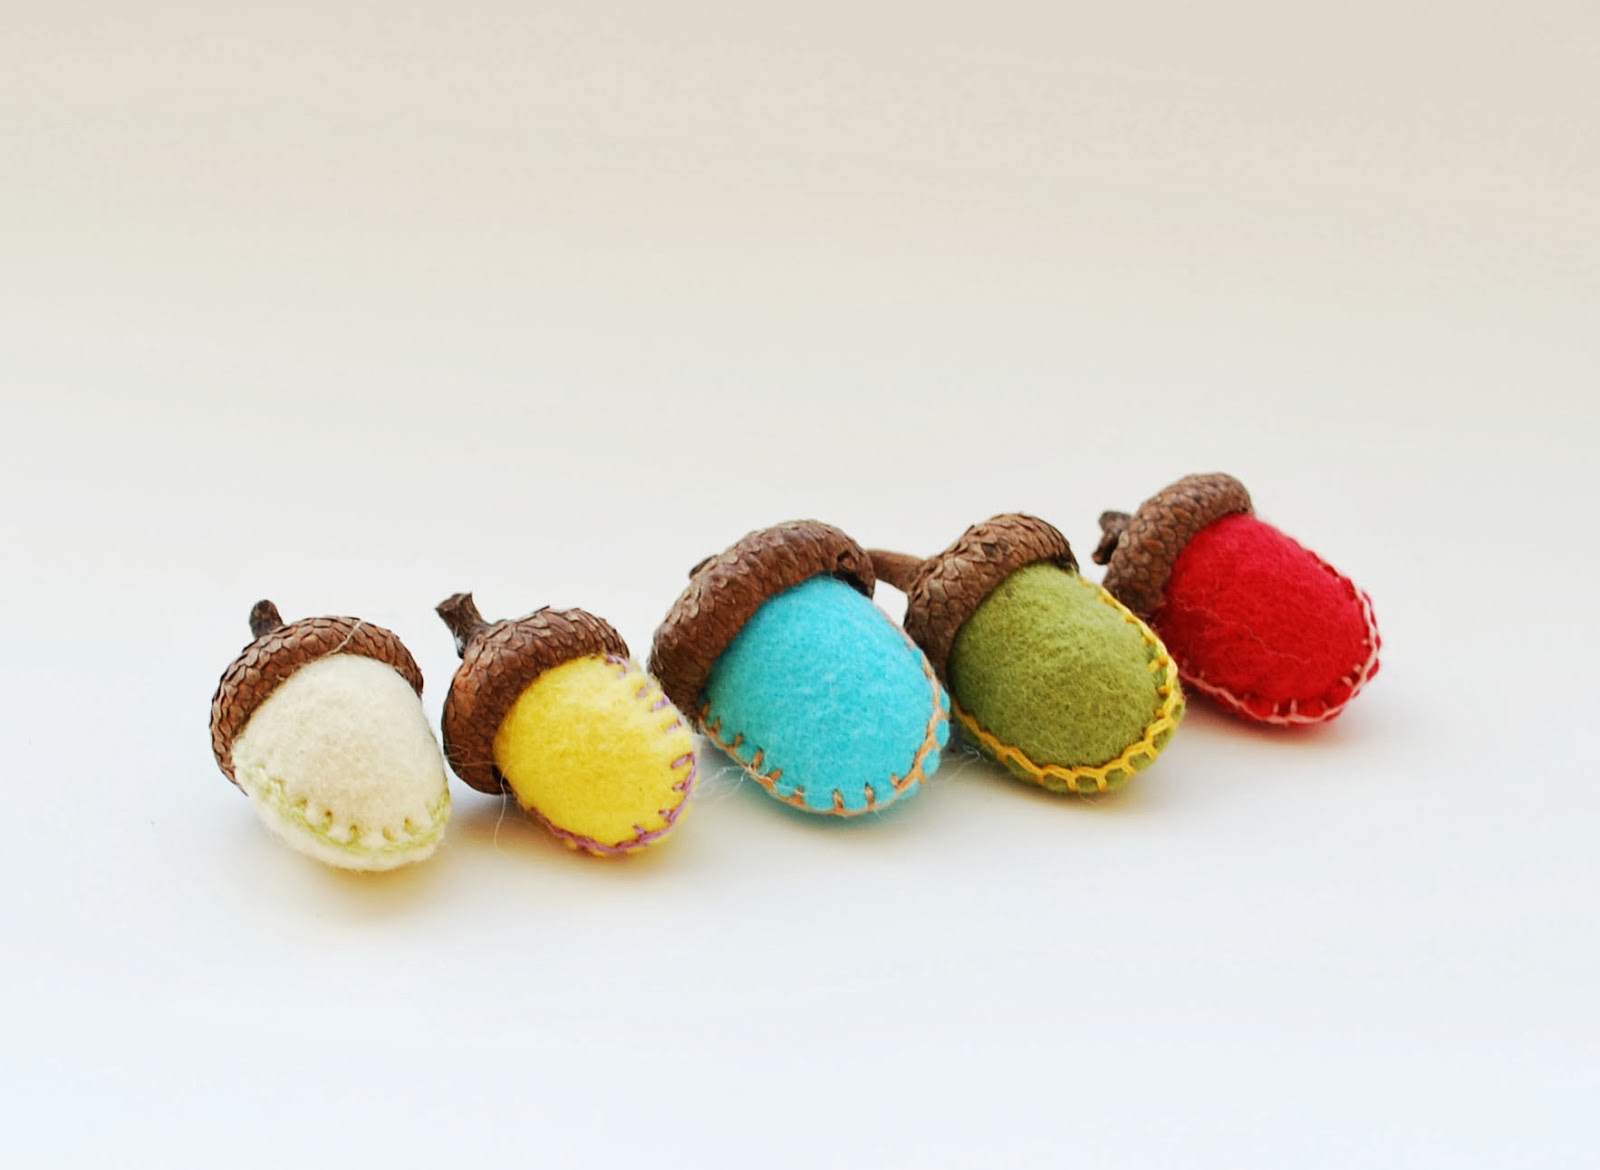
Wool Felt Acorn Tutorial

I started making felt acorns seven years ago.  I was living in an area with a plethora of oak trees and there seemed to always be hundreds of acorns on the ground.

I made these little felt acorns to pass the time. I was far away from family with no car and no television. I also made these felt acorns to share with family members.  My mom and her side of the family have a connection with acorns. Along with other reasons for the connection, their high school mascot was the 'mighty acorn'.  You can't beat that for a school mascot!


Felt Acorn Tutorial

Materials: 
Two small pieces of wool felt
Embroidery floss
Wool roving or other stuffing
Real acorn caps

Tools:
Scissors
Embroidery needle
Hot glue gun
Hot glue sticks


Step 1: Cut the felt

Cut two pieces of felt to 1 square inch each in size.  In this tutorial I use two different colors of blue wool felt so it's easier to see how I make the acorn.


Place the felt squares together. Using your scissors, round off two corners of both of the felt squares.  This makes your basic acorn shape.  The rounded corners are the bottom of the acorn nut.

Step 2: Blanket stitch

Thread your embroidery floss through your needle.  Choose how many strands of thread you will use based on how much you want your thread to show.  I chose to use a contrasting color of thread and use two of the six embroidery-floss strands.

Place your two pieces of wool felt together so they are totally lined up.  Starting at the top corner of the acorn, blanket stitch around the edge of the two pieces of cut wool felt, sewing them together. When you finish, you should have something that looks like a tiny pocket. Trim the extra thread.


Step 3: Stuff and Glue

Stuff your felt acorn with tiny pieces of wool roving until it is firm.  It will be helpful to have several different sizes of acorn caps at this point.  Try different caps on your felt acorn until you find the perfect fit.  Once you find the acorn cap you are going to use, flip it over and put hot glue around the inside edges and in the middle of the underside of the acorn cap.  Gently push the felt acorn into the underside of the cap, open side up, and hold until the hot glue has cooled.


And you're done!

It was this little acorn that I crafted seven years ago that got me thinking about sharing my crafts with others.