

Wednesday, December 19, 2012
Christmas Angels
Friday, December 7, 2012
Mushroom Pincushion Tutorial
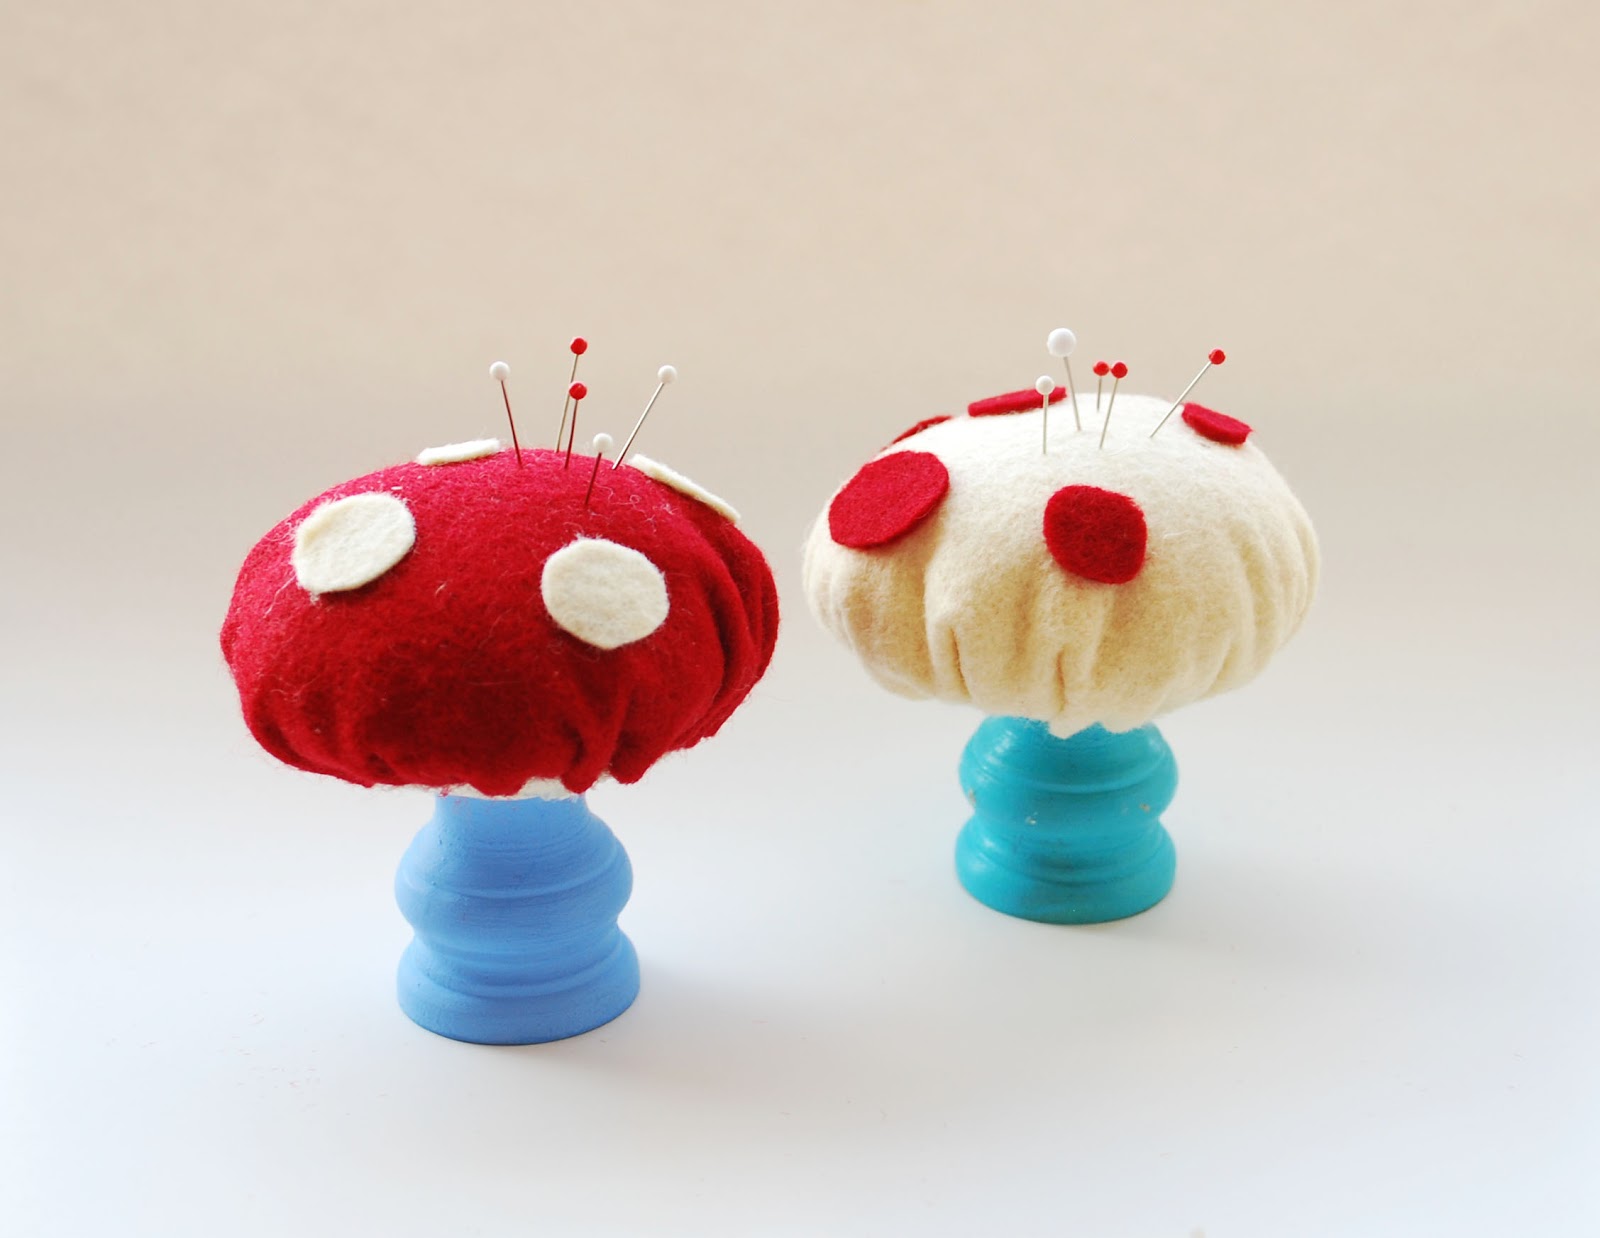
I thought it would be fun to have some cute pincushions on the crafting table at this event. So here is what I made. You can make one too!

After thinking about it for a while, it was decided. I would make mushroom pincushions. Here's how I did it.
Materials:
wooden candle holders
paint
wool felt
stiff felt
stuffing (I used wool roving)
needle and thread
glue gun
Step One:
First I painted the wooden candle holders. My kids wanted to do this project with me, but they had so much fun painting they never moved onto the felt part.

Step Two:
I cut out the felt circles. I cut a circle with a 2 1/4 inch diameter out of stiff felt as well as a circle with a 5 inch diameter out of wool felt. I used the stiff felt as the base of my mushroom top and the wool felt as the top of my mushroom.

Step Three:
Using a running stitch, I sewed along the edge of the wool felt circle and pulled slowly to gather the circle.
Step Four:
I gently rolled the wool roving into a ball and stuffed it into the gathered felt mushroom top. Then I slid the stiff felt circle into the gathered felt circle to cover the stuffing. I also flipped the candle holder upside down and hot glued it to the middle of the stiff felt circle.

I tightened the mushroom top around the candle holder by gently pulling the running stitch. I stitched this in place. For extra security I also hot glued the gathered edged of the mushroom top to the candle holder.

I cut out small circles with another color of felt and simply hot glued them on to the top of the mushroom.

Monday, November 26, 2012
Felt Fortune Cookie Advent Calendar

Saturday, November 17, 2012
Baby Jesus' Manger

That's our manger (inside the suitcase). We just decided to put the manger, along with all of the extra hay, into this little suitcase to cut down on a big mess.
Wednesday, November 14, 2012
Winter Terrarium

I've turned four glass food canisters into winter terrariums. The tallest jar has a toy deer and a little fuzzy weed that looks like a tiny tree. The second jar has another tiny tree and a vintage-inspired Santa ornament. The third jar has some paper Christmas trees. For the fourth jar I made a tiny wool felted snowman with a felt hat.


To make the brim of the hat I cut a small circle of black felt. The top of the hat is made of a strip of black felt. I rolled up the strip of felt starting on the short side, and hot glued it in place when it was all rolled up. Then, I simply glued the rolled up felt onto the middle of the circle.

Oh, by the way, for all of the snow I used leftover fake spider webs from Halloween.
Saturday, November 10, 2012
It's Beginning to Look a Lot Like Christmas

I've been slowly taking Christmas decorations out and putting them around the house.


I saw these two reindeer at a thrift store. When I first walked past them I couldn't believe how ugly they were, but as I walk around the store I couldn't stop thinking about them. After taking a lap around the store looking at other things, I decided I wanted to buy these little ugly reindeer. I found myself in a panic, rushing back to them and hoping they were still there. They were, of course. I think they look great with these funny, little elves riding on them. They are resting on a small wooden chair that I have on one my walls.

These little elves move from place to place around the house, watching for good behavior. One is named Dirk. Dirk is the elf that brought me small toys and candy during the month of December when I was a kid. The other is named Durf. He's the new guy. The kids have high hope that these elves will reward their good behavior come December.
Wednesday, November 7, 2012
Crayons and Creativity
Monday, November 5, 2012
Chandelier Silhouette

Wednesday, October 31, 2012

Tuesday, October 30, 2012
Mummies and Skeletons


Monday, October 29, 2012
Mummy Clothes Pin Doll


The kids and I are in the middle of making mummy clothes pin dolls for Halloween. I let them paint the clothes pins and heads with watered-down white acrylic paint.

After dotting on eyes with black paint, I glued the heads on with hot glue. I also added white pipe-cleaner arms by wrapping a piece of pipe cleaner around the mummy at the shoulder area, twisting the pipe cleaner once at the mummy's back, and hot gluing it in place at the twist.


I'm just glad these mummy clothes pin dolls are a much faster project than the clothes pin dolls that I made for my wedding cake. I didn't understand why people charged so much for similar cake toppers until I made a couple. When I finished my cake toppers six hours later, I had a much better understanding.
And yes, I am taller than my husband.
Thursday, October 25, 2012
Tutorial: Tree House Elf


Micah asked me if we could make little people that fit in the train seats and so we did. I thought these guys were so cute, I had to share.
Materials:
*wooden beads of different shapes and sizes (about 12mm or 1/2 inch)
*black acrylic paint
*wool felt in assorted colors (at least 20% wool)
Tools:
* hot glue gun and hot glue sticks
*pin with medium size head
*needle nose pliers (optional)
Step 1

Glue two beads together using your hot glue gun. These beads will make the body and head of your elf.
Hint: The bead used for the body should be shaped in such a way that it can hold up the head and stand on its own.
Step 2

Step 3


Glue on small squares of wool felt to the head of your elf using your hot glue gun. Let this cool.
Hint: I have tried this with art felt and the results are just not the same. I highly recommend using wool felt.
Step 4


Repeat these steps, gluing and ripping, until the hair is to your desired thickness and shape.
And you're done.


Enjoy!
Note: Perhaps this project could be done faster by using wool roving for the hair. I didn't have any on hand and used felt instead.
Monday, October 22, 2012
Halloween Witch and Bat


She bought these for her sister, whose birthday is near Halloween.
Saturday, October 20, 2012
Ghost Garland: A kid friendly craft


My kids and I made this ghost garland to go in our branch on the wall. It was simple, quick, and fun to make.
We started out with wide, wavy popsicle sticks that I picked up at the craft store long ago for another project. The other project never panned out, but this craft went well.
I cut the sticks at different lengths and let the kids paint them white with watered down acrylic paint. Once dry, I dotted on eyes and a mouth and hot glued the ghosts onto a ribbon. Done! It was that easy.
It would be fun to give each ghost his or her own look...some glasses, a tie, or maybe a hair bow.
Thursday, October 18, 2012
Little Owls


My mom is going to visit her mother in a few days and asked me to make something for my grandma. Many of my relatives on my mom's side of the family are drawn to owls, acorns, and mice.
For inspiration, I did an image search on Google for felt owls and then created these guys.
Wednesday, October 17, 2012
A Branch on My Wall


I have several bare walls in my house. This wall is no longer empty.
While in the park with my kids I found this large branch on the ground. Others may have thought I was crazy, but I picked it up and walked it directly over to my car and put it in the trunk. I didn't know exactly what I was going to do with it, but I knew I would do something.
So, I painted the branch yellow, put two eye hooks into it, and hung it on my wall. I already have a small nest resting on the branch. I'm excited to set more things in this little tree branch on my wall.
Subscribe to:
Comments (Atom)